m
|
|
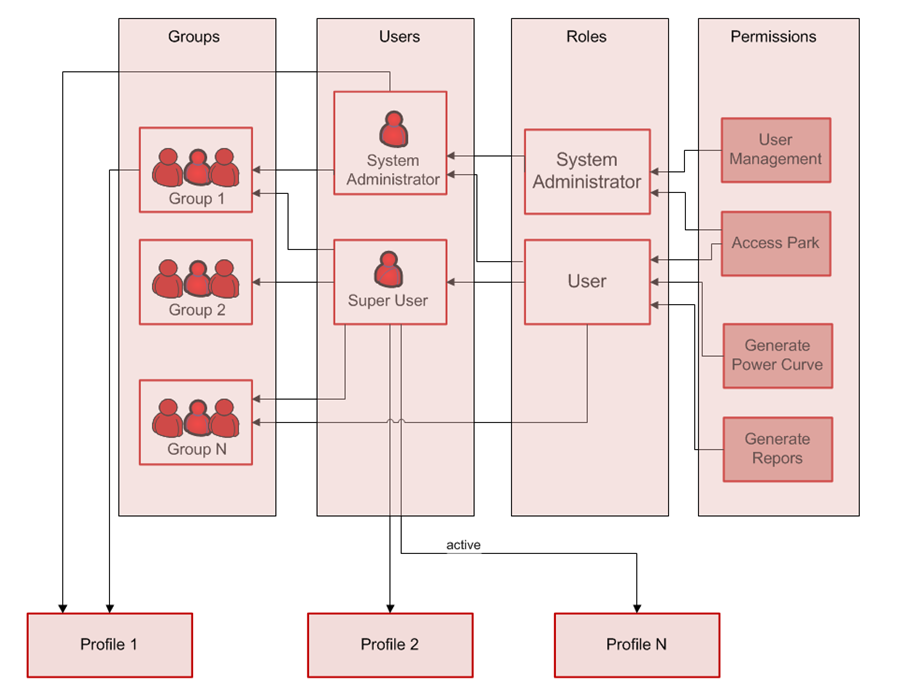
The whole User Management concept is demonstrated by the following diagram, explaining the relations between users and their roles. Separate users, or groups of users, are assigned different roles. Each role combines a different set of permissions. By a permission is meant an access to a certain functionality in MiScout SCADA.
General recommendations for organizing users, groups, roles and permissions:
If all recommendations above are fulfilled then adding new user consists in following steps:
The concept of user management mentioned above has been implemented in Users section of Administrative part. By activating the Users navigation menu in MiScout, a user gets access to its main functionality tabs including the following:
A detailed description of the functionality provided by each tab can be found in a separate section further in this manual chapter.
The purpose of the Users tab is creating, deleting and editing users. This includes assigning permissions or roles to users or including users into different groups thus granting them appropriate permissions. In case of using Windows Active directory integration import of users is possible.
The Users grid contains a pre-defined number of columns, each containing specific information about a corresponding user:
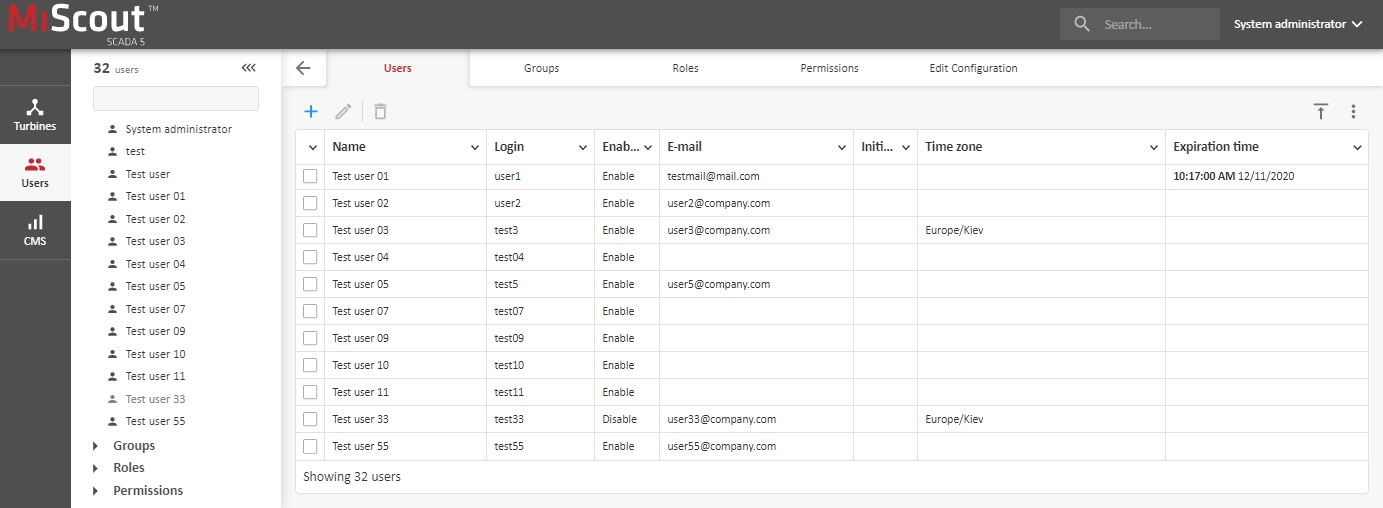
Data sorting and filtering are especially applicable when working with a big amount of information. Therefore, each column of the Users grid contains a special filtering icon offering a set of sorting/filtering options.
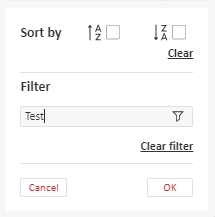
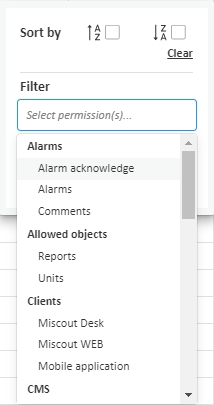
By clicking the headline column of the grid you can open a special contextual menu providing you with the possibilities to sort and filter a corresponding grid content.
 Sort by
For example, the content of the cells under the Name can be sorted in an alphabetical order from A to Z or vice versa - from Z to A . To withdraw any settings enabled for data sorting, press the Clear button.
 Filter
This part of the contextual menu allows filtering Users in the grid based on their properties. On entering the appropriate text and pressing the OK button, the information in the grid will be filtered accordingly. To withdraw any filtering settings, press the Clear filter button.
Please keep in mind, when filtering and/or sorting in the headline column is activated, corresponding Sort by and/or Filter icons appear next to the column name.
Also user can be found by using Search box in the top area of the screen. It can be accessed via Ctrl-F shortcut.

Type part of user name or login name or e-mail address into text box following by Enter key. As result users table shows only records matching filtering criteria. Clear Search box and press Enter to reset filter.
New user can be easy created by pressing on New  button placed in the left top corner of main working area.
Also New button can be pressed from contextual menu  in the right top corner of main working area.
After pressing New button user is redirected to Edit Configuration tab where should fill in account properties.
For more detail instructions regarding User settings, see Editing Configuration tab discussed below.
To commit changes user have to press Save  button placed in the right bottom corner of main working area. This button appears as soon as user has made any changes in account properties. User name and Login are obligatory fields for filling in.
To discard changes.user should press Undo  button.
If MiScout in your setup uses integration with Windows Active directory then you can import users from there.
To use this option you should press Import  button placed in the right top corner.
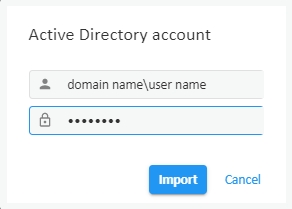
After pressing the button you have to enter your Active Directory account credentials in appeared dialog window.
Since you logged in Active Directory the users import window will appear. To perform import you should select required users from left side by checking appropriate check boxes and press ">" button. Use Filter text box to find appropriate user by name or login.
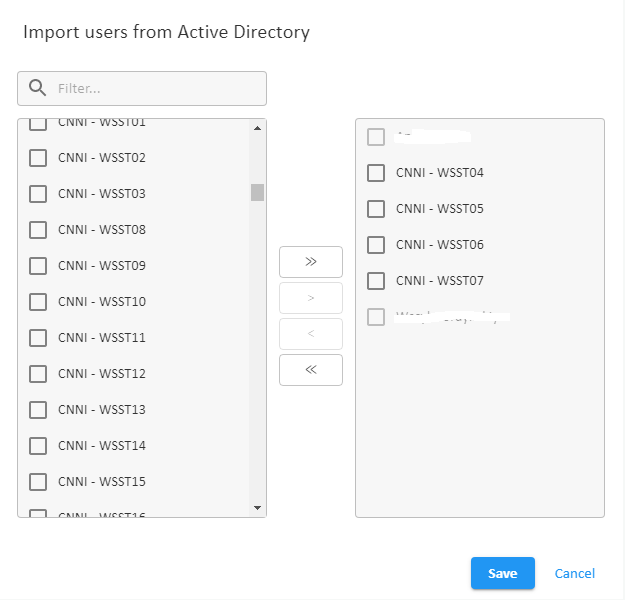
Next you should press "Save" button to commit changes or "Cancel" button to discard import. After saving imported user appears in list of users registered in the system. Afterwards that user must be granted necessary permissions to be able to use MiScout.
Selected in the grid users can be easy deleted by pressing on Delete  button placed in the left top corner of main working area.
Currently edited object can be also deleted from contextual menu in the right top corner of main working area.
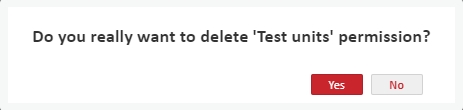
Any delete operation must be confirmed by pressing Yes on pop-up dialog.

To edit user account properties you should click on user in Object navigation tree. Thus you will be redirected to the Edit Configuration tab where can edit account information for selected user.
The other way to edit user accounts is selecting necessary users by checking corresponding checkboxes in the grid with follow pressing of Edit  button.
Also Edit button can be pressed from contextual menu in the right top corner of main working area.
After pressing Edit button you will be redirected to Edit Configuration tab where can change required account information.
For more detail instructions regarding User settings, see Editing Configuration tab discussed below.
To commit changes you have to press Save button placed in the right bottom corner of main working area.
To discard changes.you should press Undo button.
The purpose of the Groups tab is creating, deleting and editing user groups. This includes assigning permissions or roles to groups or including users into them. In case of using Windows Active directory integration user groups import is possible.
Therefore, you can perform the following configuration routines:
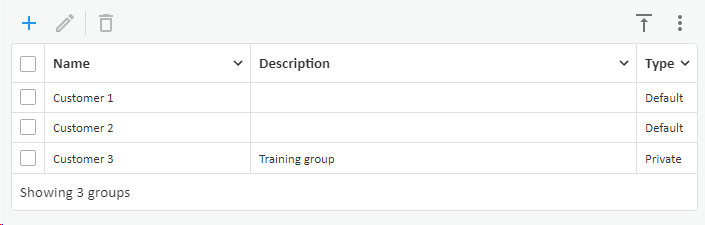
The Group grid contains only two columns:
By clicking the headline column of the grid you can open a special contextual menu providing you with the possibilities to sort and filter a corresponding grid content.
Sort by
For example, the content of the cells under the Name can be sorted in an alphabetical order from A to Z or vice versa - from Z to A . To withdraw any settings enabled for data sorting, press the Clear button.
Filter
This part of the contextual menu allows filtering Groups in the grid based on their properties. On entering the appropriate text and pressing the OK button, the information in the grid will be filtered accordingly. To withdraw any filtering settings, press the Clear filter button.
Please keep in mind, when filtering and/or sorting in the headline column is activated, corresponding Sort by and/or Filter icons appear next to the column name.
Alternatively Group can be found by using Search box in the top area of the screen. It can be accessed via Ctrl-F shortcut.
Type part of Group name or Group description into text box following by Enter key. As result Group table shows only records matching filtering criteria. Clear Search box and press Enter to reset filter.
Creating Groups
New group can be easy created by pressing on New button placed in the left top corner of main working area.
Also New button can be pressed from contextual menu in the right top corner of main working area.
After pressing New button you will be redirected to Edit Configuration tab where should enter all required data regarding new Group.
For more detail instructions regarding Group settings, see Editing Configuration tab discussed below.
To commit changes user have to press Save button placed in the right bottom corner of main working area. This button appears as soon as user has made any changes in group properties. Group name is obligatory field for filling in.
To discard changes.user should press Undo button.
Also Groups can be imported from Windows Active directory in the same way as Users. For more detail information on import function, refer to Users import section.
Selected in the grid groups can be easy deleted by pressing on Delete button placed in the left top corner of main working area.
Currently edited object can be also deleted from contextual menu in the right top corner of main working area.
Any delete operation must be confirmed by pressing Yes on pop-up dialog.

To edit group properties user should click on the group in Object navigation tree. Thus you will be redirected to the Edit Configuration tab where can edit information for selected group.
The other way to edit group properties is selecting necessary group by checking corresponding checkboxes in the grid with follow pressing of Edit button.
Also Edit button can be pressed from contextual menu in the right top corner of main working area.
After pressing Edit button you will be redirected to Edit Configuration tab where can change required information for selected group.
For more detail instructions regarding Group settings, see Editing Configuration tab discussed below.
To commit changes you have to press Save button placed in the right bottom corner of main working area.
To discard changes.you should press Undo button.
The purpose of the Roles tab is creating, deleting and editing user roles.
There you can perform the following configuration routines:
The Roles grid contains only two columns:
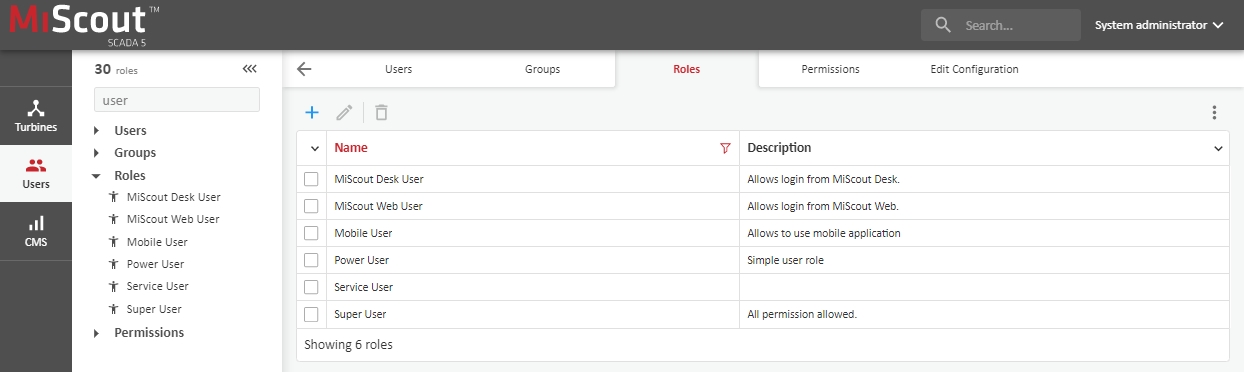
Roles grid can be sorted or filtered by the same way as it was described for Groups.
For more detail information, refer to Sorting and filtering grid content section placed above.
User have possibility to create new Role by two different ways.
The first is to press on New button placed in the left top corner of main working area.
The second is to press New button from contextual menu in the right top corner of main working area.
After pressing New button user will be redirected to Edit Configuration tab where should configure all required properties for new Role.
For more detail instructions regarding Role settings, see Editing Configuration tab discussed below.
To commit changes user have to press Save button placed in the right bottom corner of main working area. This button appears as soon as user has made any changes in Role properties. Role name is obligatory field for filling in.
To discard changes.user should press Undo button.
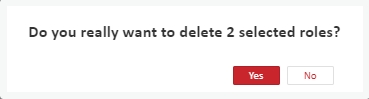
Selected in the grid roles can be easy deleted by pressing on Delete button placed in the left top corner of main working area.
Currently edited object can be also deleted from contextual menu in the right top corner of main working area.
Any delete operation must be confirmed by pressing Yes on pop-up dialog.
To edit role properties user should click on the role in Object navigation tree. Thus you will be redirected to the Edit Configuration tab where can edit information for selected role.
The other way to edit role properties is selecting necessary role by checking corresponding checkboxes in the grid with follow pressing of Edit button.
Also Edit button can be pressed from contextual menu in the right top corner of main working area.
After pressing Edit button you will be redirected to Edit Configuration tab where can change required information for selected role.
For more detail instructions regarding Role settings, see Editing Configuration tab discussed below.
To commit changes you have to press Save button placed in the right bottom corner of main working area.
To discard changes.you should press Undo button.
The purpose of the Permissions tab is permissions management. Permissions in MiScout is used to manage access to system functions, parks, units, reports, data sets, etc.
There user can perform the following configuration routines:
The Permissions grid contains following columns:
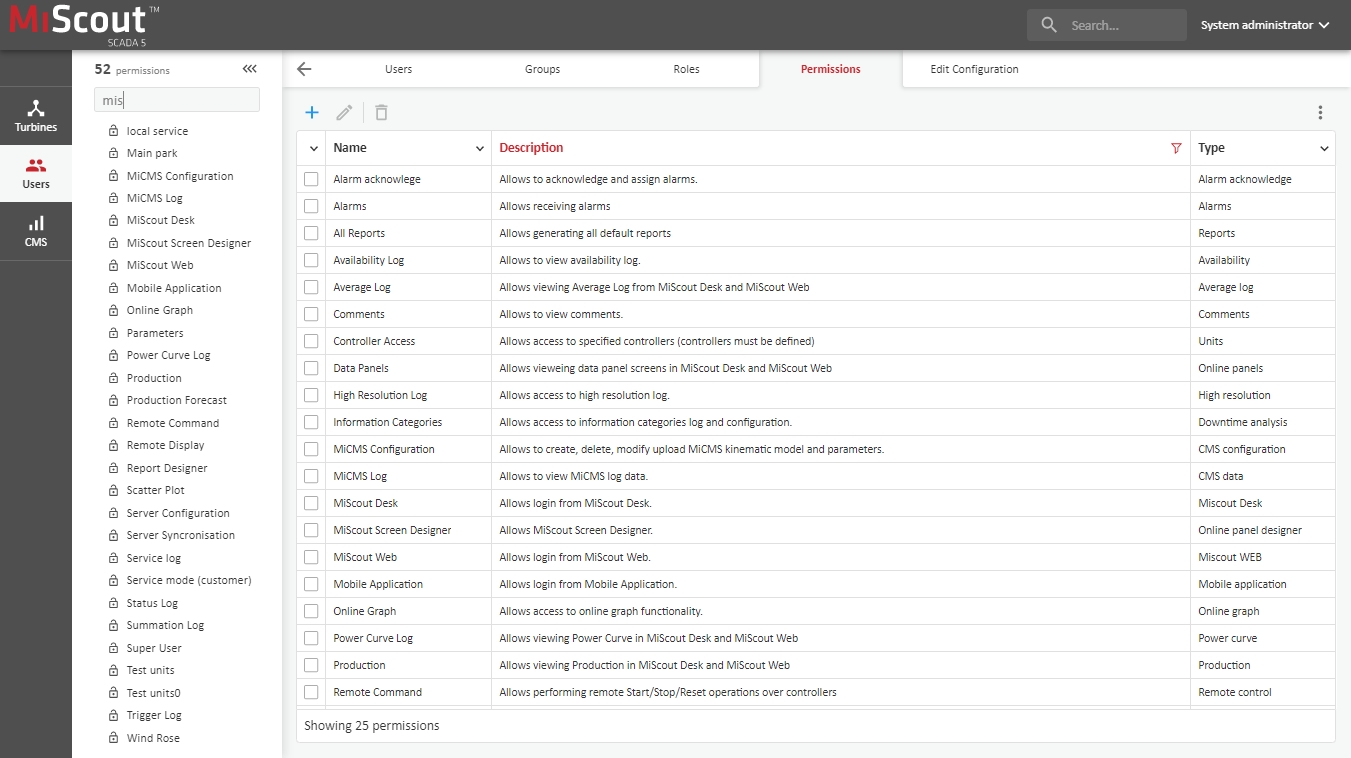
Permissions grid can be sorted or filtered by the same way as it was described for Groups.
For more detail information, refer to Sorting and filtering grid content section placed above.
The only difference is that permission Type can be sorted by selecting necessary type from structured drop down list.
User have possibility to create new Permissions by two different ways.
The first is to press on New button placed in the left top corner of main working area.
The second is to press New button from contextual menu in the right top corner of main working area.
After pressing New button user will be redirected to Edit Configuration tab where should configure all required properties for new Permission.
For more detail instructions regarding Role settings, see Editing Configuration tab discussed below.
To commit changes user have to press Save button placed in the right bottom corner of main working area. This button appears as soon as user has made any changes in Permission properties. Permission name and Type is obligatory field for filling in.
To discard changes.user should press Undo button.
Selected in the grid permissions can be easy deleted by pressing on Delete button placed in the left top corner of main working area.
Currently edited object can be also deleted from contextual menu in the right top corner of main working area.
Any delete operation must be confirmed by pressing Yes on pop-up dialog.
To edit permissions properties user should click on the permission in Object navigation tree. Thus you will be redirected to the Edit Configuration tab where can edit information for selected permission.
The other way to edit role properties is selecting necessary permission by checking corresponding checkboxes in the grid with follow pressing of Edit button.
Also Edit button can be pressed from contextual menu in the right top corner of main working area.
After pressing Edit button you will be redirected to Edit Configuration tab where can change required information for selected permission.
For more detail instructions regarding Permission settings, see Editing Configuration tab discussed below.
To commit changes you have to press Save button placed in the right bottom corner of main working area.
To discard changes.you should press Undo button.
This menu item is used to edit and fill properties of the following objects: users, groups, roles and permissions. Usually user is redirected to this menu item after creating or editing any of these objects.
Right after clicking the User in the Object navigation tree, the User editing form is displayed within the main application window allowing you to view and edit user account properties.
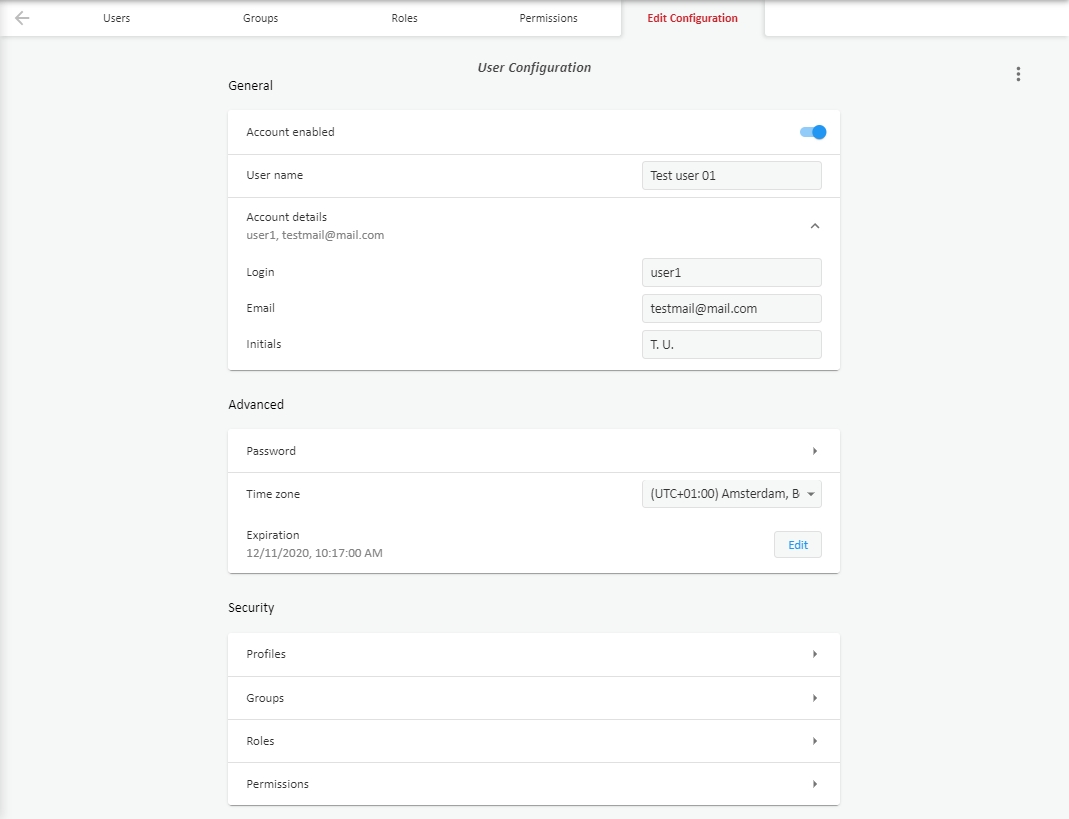
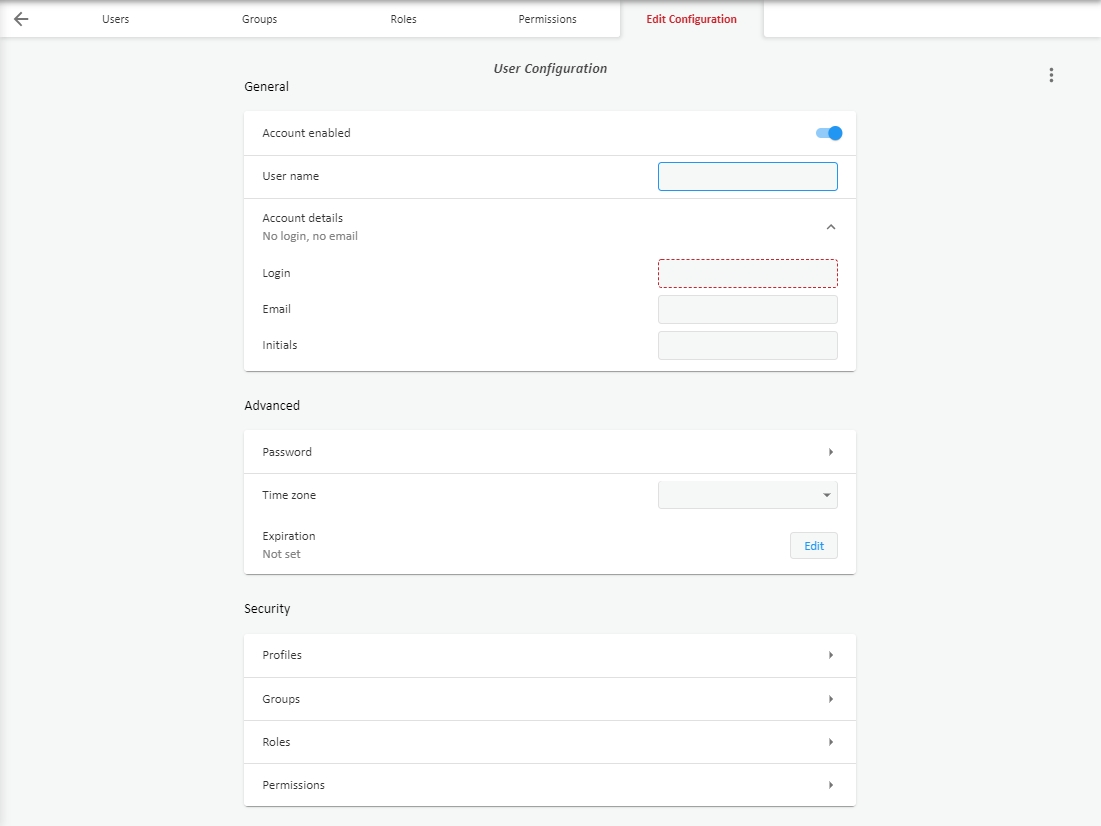
All properties are split into tree section General, Advanced and Security.
In the top of General section you can find Account enabled toggle  which identifies whether a user is enabled or disabled. If a user is disabled, it means that it is impossible to login under this user, even though it has been created. By default, the Enable check-box is selected automatically. If you deselect the box, a user will become disabled.
Underneath resides User name that can be edited by entering required name.
Under the name situates Account details sub-section which can be expanded by clicking on  button. Let’s type Login, as well as the optional fields like E-mail and Initials. Be aware that Login must be unique in the system. It is recommended to use for login Latin letters without using spaces and special symbols like: \, /, *, +, -, etc.
Below in the top of Advanced section presented Password which can be set by clicking on  button.
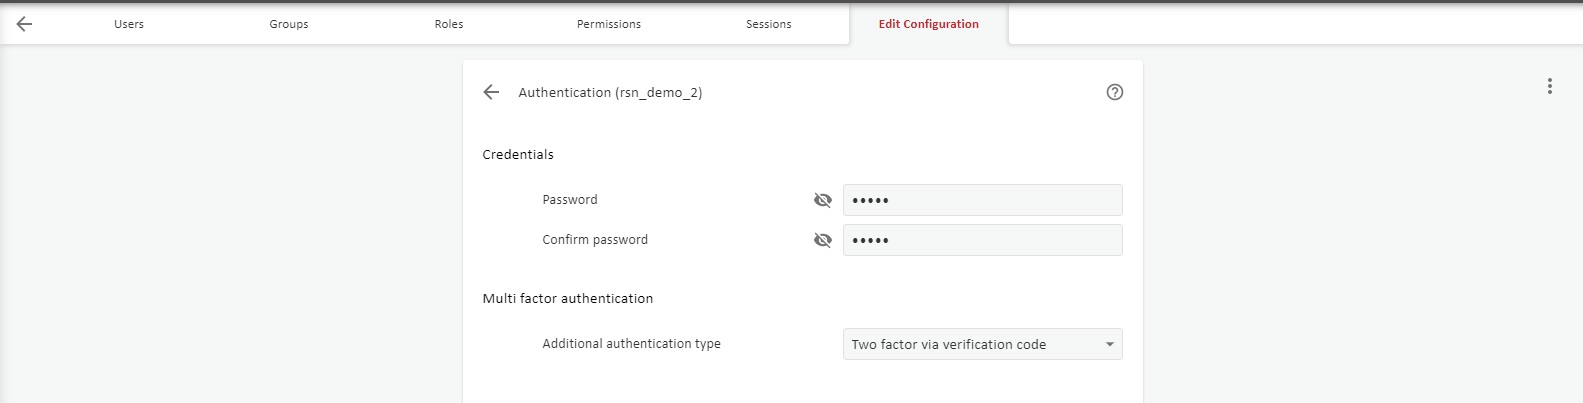
Note: if there is turned on password complexity validation then password must match minimum configured complexity. Otherwise user will be asked to change it during next login.
Additionally here you can select Multi Factor Authentication method:
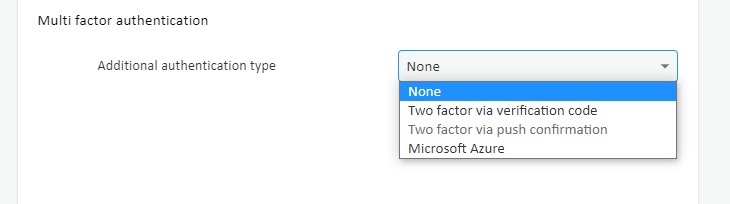
MiScout support several different MFA methods:
In general all MFA methods can be spitted on two types:
For native one there is used verification using 6 digits codes which are valid for 60 seconds only. Such codes are supported by Google Authenticator and Microsoft Authenticator aps available on Apple store and Google play. Advantage is that such approach does not require Internet connection: security codes are generated using secret key known for app and SCADA server.
Note: Native MFA type available only for Two factor via verification code method.
For external MFA there could be used third-party service as like Duo Mobileapplication. For such MFA there are acceptable:
Note: External MFA type available for Two factor via verification code and Two factor via push confirmation method.
Time zone option that situated below allows to specify user time zone.
Expirationoption that resides underneath can be opened by pressing  button. There user can set account expiration date. After that date account gets disabled automatically thus prohibiting user from login to MiScout. This option is useful to use for trial user accounts.
The next is Security section which serves to manage user access and contain following sub-section:
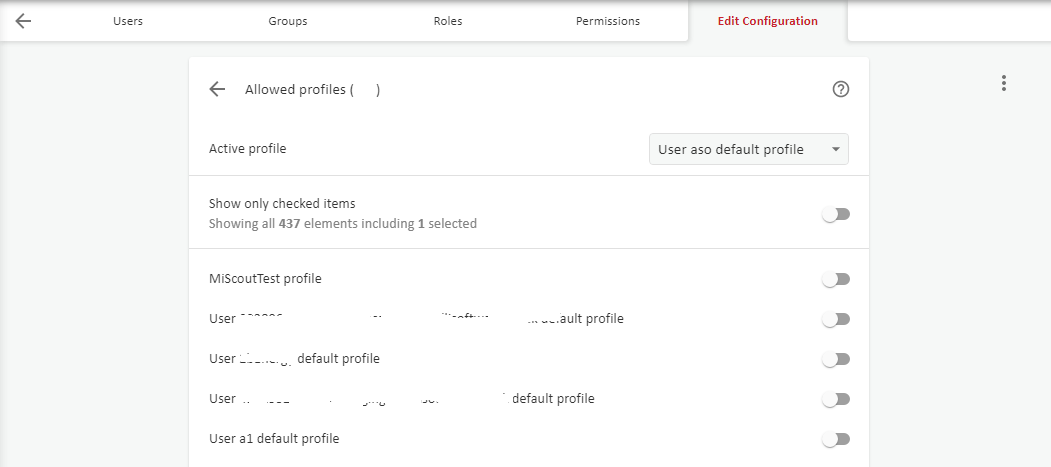
Profiles - displays information about active user profile and list of available profiles. All user personal settings are stored in User profile. This includes all settings available in My Account menu, workspaces configuration, selected units, last opened widget, etc.
Combo box Active profile allows selecting profile which will be active for current user. Combo box shows list of available profile for user.
Allow one or several profiles by switching on appropriate toggles . Use option Show only checked items to display only available profiles.
Groups - displays all available groups. Assign user to one or several groups by switching on appropriate toggles . Use option Show only checked items to display only Groups to which current user is assigned.

In case of adding user to a Group ,all group Roles and Permissions are inherited.
Roles sub-section specifies which roles will be assigned to the user by switching on appropriate toggles , from the list of available. Use option Show only checked items to display only Roles to which current user is assigned.

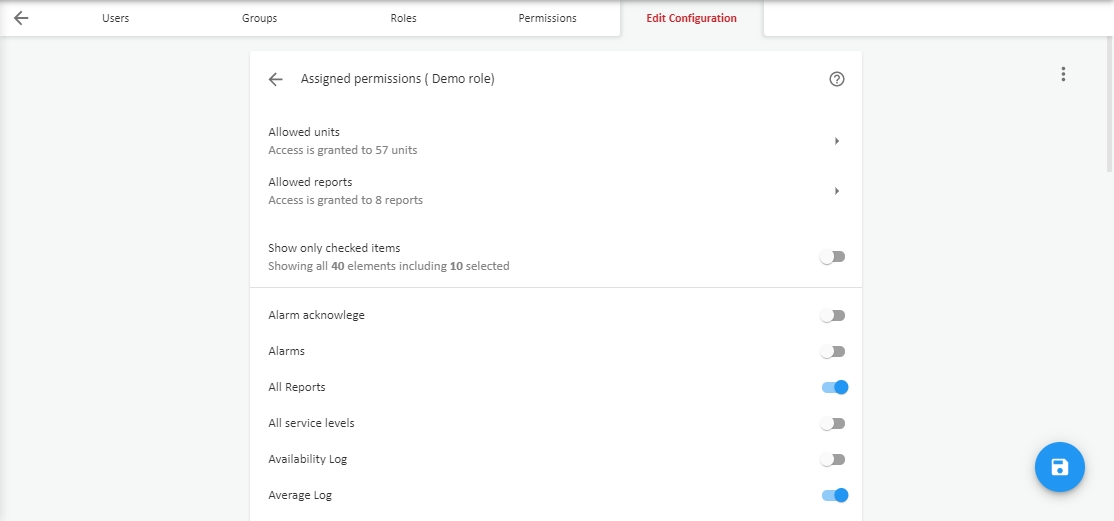
Permissions -allow access to certain functionality or data. To assign permissions you should switch on appropriate toggles . Use option Show only checked items to display only Permissions assigned to current user.
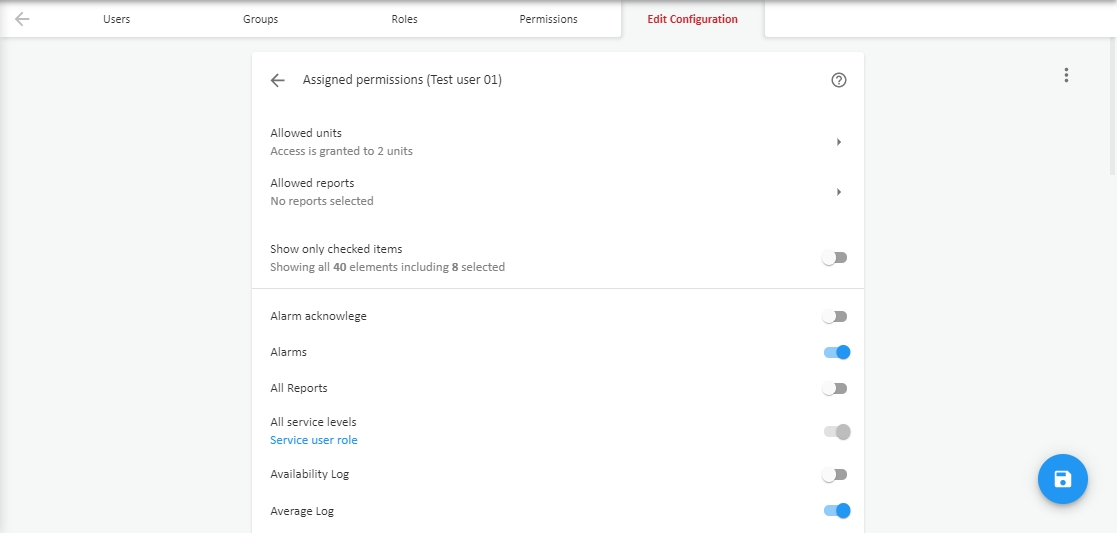
Allowed units, Allowed reports and Allowed online data sets allow granting permissions to these objects directly to user without using Role.
Permissions inherited from roles displayed as locked and cannot be edited here. You must edit corresponding Role by clicking on the link near the locked permission.
Note: changing permissions in Role affect also other users who inherit its permissions.
By default MiScout contains the following predefined users:
Right after clicking at Group in the Object navigation tree or in Groups grid, the Group editing form is appeared within the main application window allowing user to configure group settings.
A group of users shares the same roles and profile. It is useful to create a group of users for their fast management.
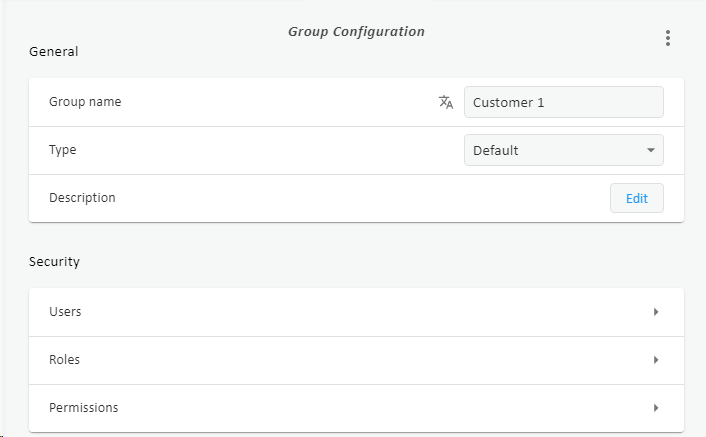
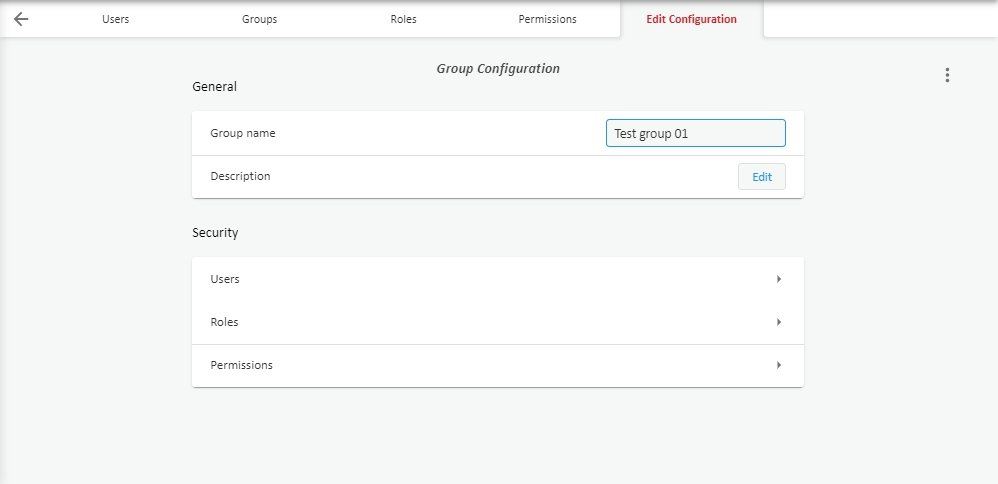
All Group properties are split into General and Security section.
In General section you can specify Group name, Type and Description properties.
Note: users are always visible inside of the same group
Visibility here means that user name appears in the list of users when performing the following operations:
Underneath resides Security section which contain following sub- sections:
Users sub-section - allows add user to current group by switching on appropriate toggles . Use option Show only checked items to display only users belonging to this group.
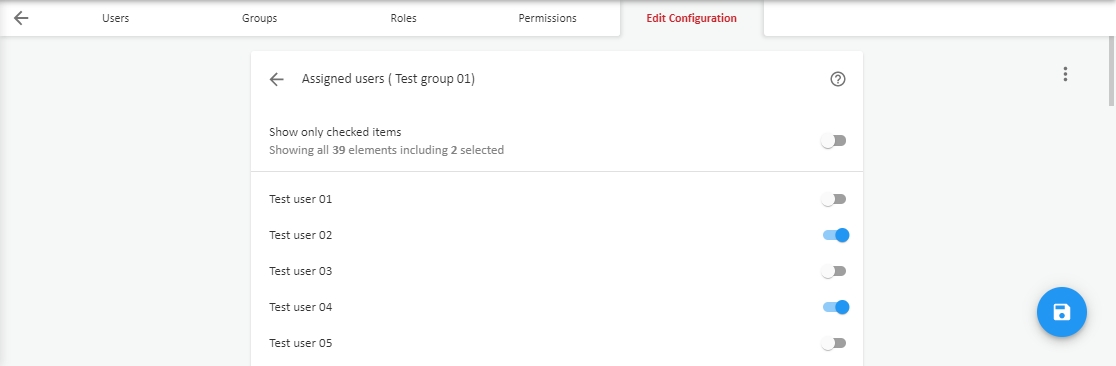
In case of adding user to a Group he will inherit all group Roles and Permissions.
Roles sub-section specifies which roles will be assigned to the group by switching on appropriate toggles , from the list of available. Use option Show only checked items to display only Roles which this group includes.

Permissions -allow access to certain functionality or data. To assign permissions to the group you should switch on appropriate toggles . Use option Show only checked items to display only permissions assigned to this group.
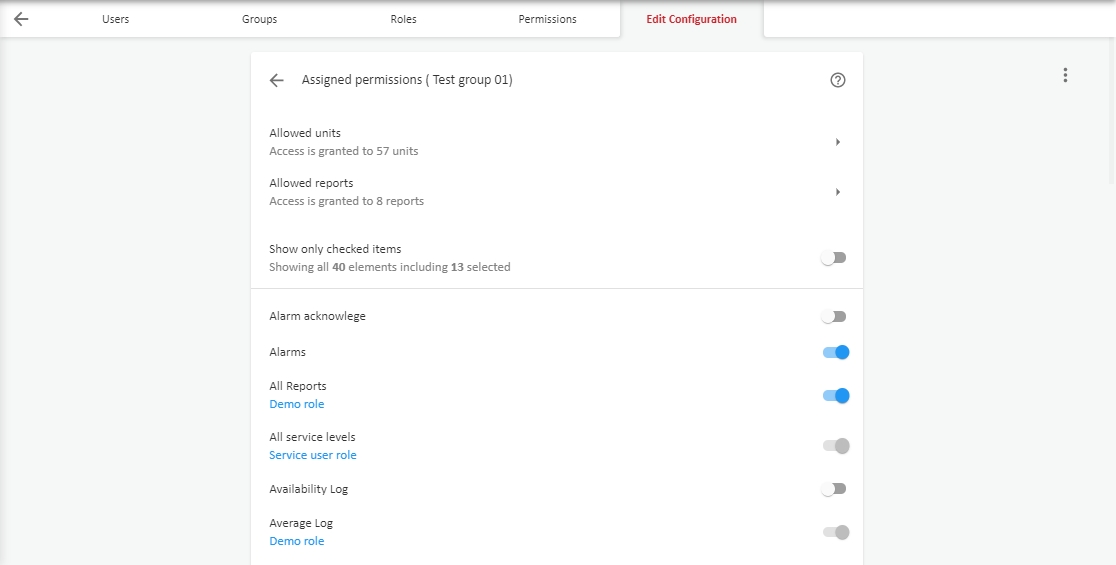
Allowed units, Allowed reports and Allowed online data sets allow granting permissions to these objects directly to group without using Role.
Permissions inherited from roles displayed as locked and cannot be edited here. You must edit corresponding Role by clicking on the link near the locked permission.
Note: changing permissions in Role affect also other groups and users who inherit its permissions.
It is convenient to use groups for Local User Administrators. Granting User Management permission to some user inside of the group allows it to perform the following operations:
MiScout comes with the following predefined groups:
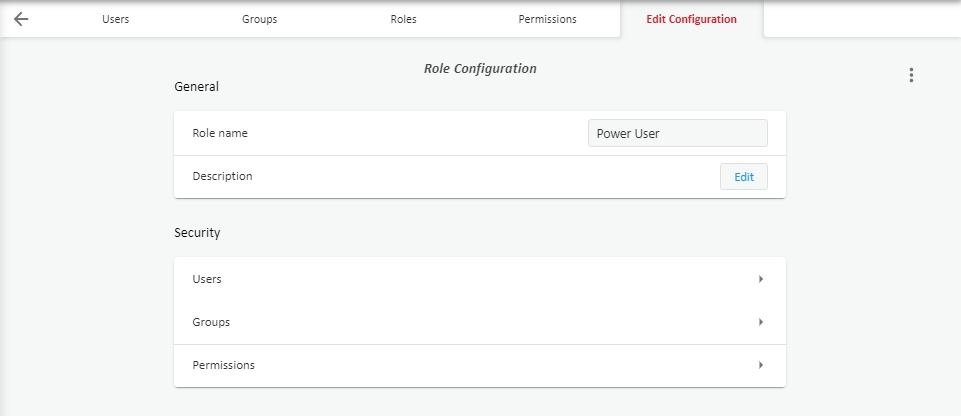
Since you clicked at Role in the Object navigation tree or in Role grid, the Roles editing form is appeared within the main application window allowing user to configure role properties.
Roles specify available operations opened to user and defined by permissions.

For Role you need to specify information by the following categories:
Role name - human readable role title which appears in all sections of User Management.
Description - should reflect role purpose.
Users sub-section allows assign users to current role by switching on appropriate toggles . Use option Show only checked items to display only users assigned to this role.

In case of assigning user to a Role all Permissions assigned for current role are inherited by assigned user.
Groups sub-section allows assign current role to some Groups by switching on appropriate toggles . Use option Show only checked items to display only groups assigned to this role.
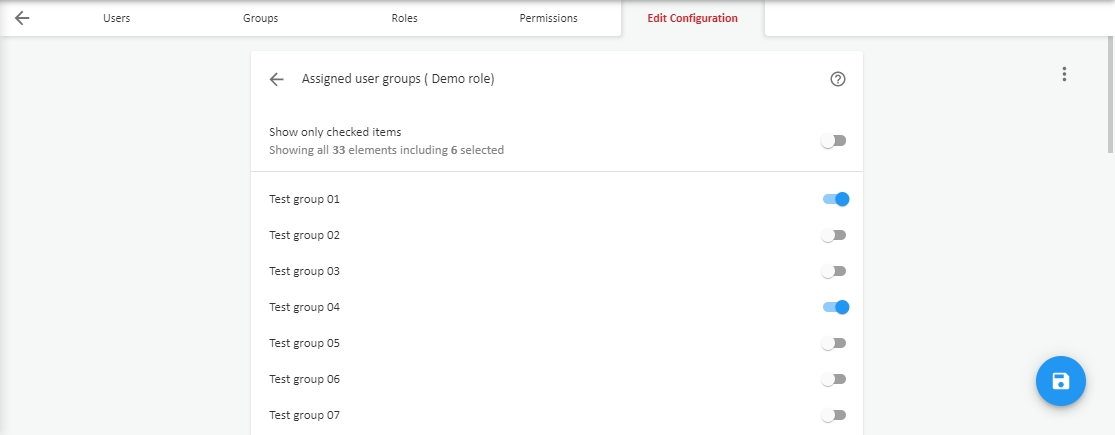
In case of assigning group to a Role all Permissions assigned for current role are inherited by all users included into assigned group.
Permissions -allow access to certain functionality or data (units, reports, data sets). To assign permissions to the role you should switch on appropriate toggles . Use option Show only checked items to display only permissions assigned to this role.
Allowed units, Allowed reports and Allowed online data sets allow granting permissions to these objects directly to Role.
Note: changing permissions in Role affect also other groups and users who inherit its permissions.
MiScout comes with the following predefined roles:
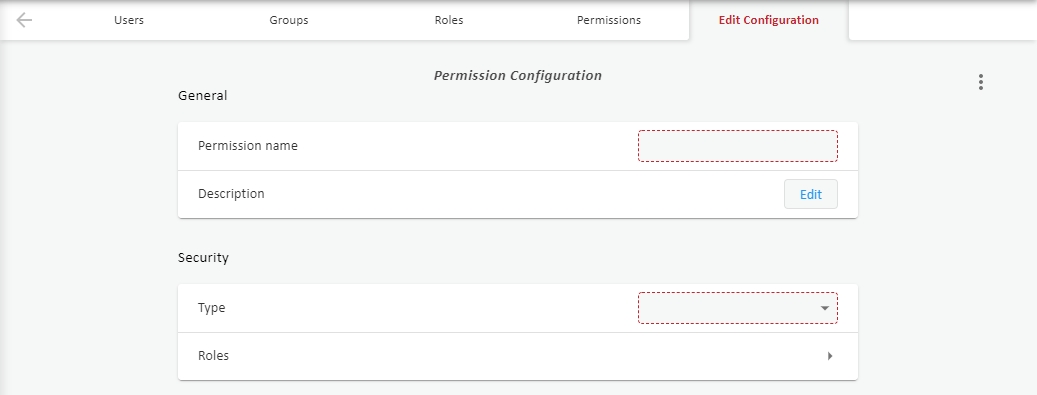
Right after clicking at Permission in the Object navigation tree or in Permission grid, the Permission editing form will appear. Permission is access to certain functionality or data and is base object type of MiScout user management concept. MiScout comes with already predefined permissions but user is free to create own ones. Creating new permission is necessary but not limited when:
User can configure next properties for editable permission:
Permission Name - title of edited permission.
Description - provide description for created permission.
Type - select a type of permission from the list of available. See details about Permission types.
Meta-Data - specify what data will be available with this permission.Content of this field depend on permission type.
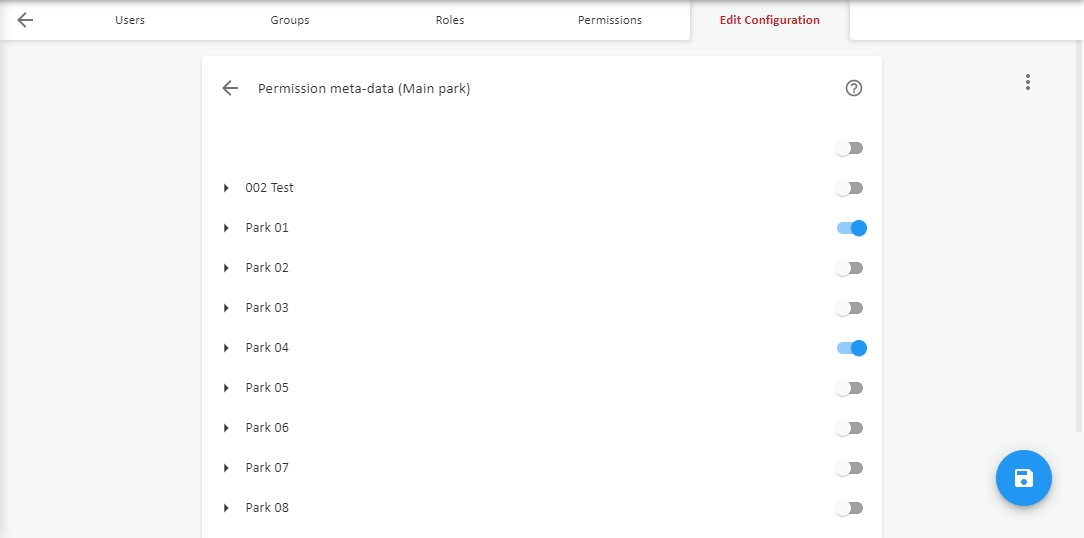
For example Meta-data for permission type Units allow to select which Plants and Units will be available with current permission. Check Meta-data description for each of available Permission types.
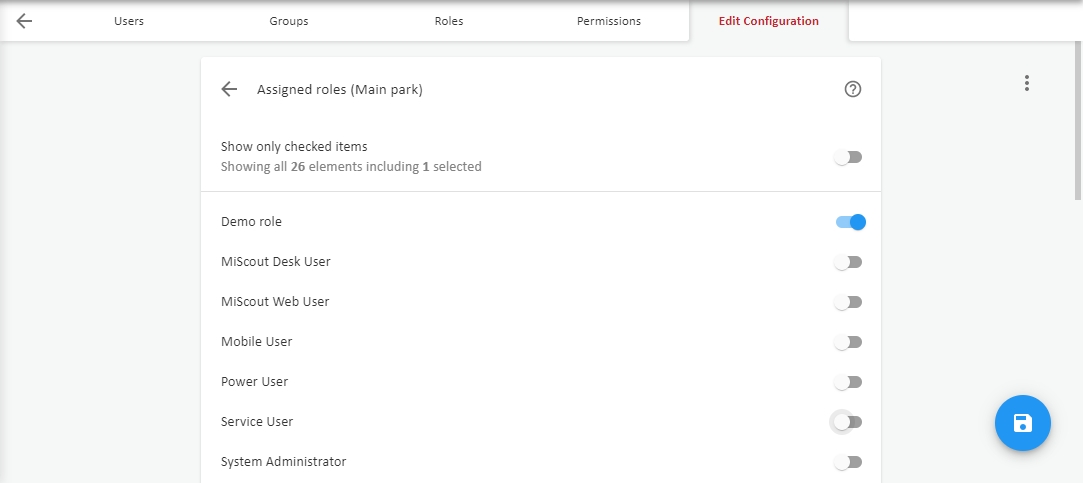
Roles - check roles which will include current permission, by switching on appropriate toggles . Use option Show only checked items to display only roles to which this permission is assigned.
To commit changes you have to press Save button placed in the right bottom corner of main working area.
To discard changes.you should press Undo button.
MiScout comes with the following predefined roles:
List below contains all permission types available in MiScout with their description, usage and Meta-data if they are presented. all permission types are split into several groups:
Note: it is recommended to leave at least one user with this permission.